


| By: Paul S. Cilwa | Viewed: 4/18/2024 Posted: 9/2/2017 |
Page Views: 3705 | |
| Topics: #Music #Ripping | |||
| How to remove extraneous ticks, pops, and rumble from the audio data from a vinyl or shellac disk. | |||

Ticks. Pops. Rumbles.
Even from a brand-new, never-played, LP with a smooth vinyl surface, there will be artifacts in your digital audio file, because the analog process of reading the grooves includes non-data components of the disk, such as microscopic bits of dust that cause ticks, clicks and pops that are faithfully interpreted by the stylus.

In addition, the turntable itself, connected to an electric motor and probably some gears, tends to transmit a deep, rumble sound through the stylus as well. Of course, as the late but influential Brtish disc jockey said,

But music is supposed to lift us above our hum-drum, workaday lives. Surface noise, whether in life or music, is just plain distracting. And distractions always impact our ability to enjoy things for their own qualities.
So…no surface noise for me!
Audacity is an open source (free) application that is as powerful an audio editor as you can find. The best place to obtain it is from SourceForge, a non-commercial open source distribution site.
The trickiest thing about Audacity is that it thinks in terms of Projects, while you are more likely to think in terms of the digital audio file you are working with. Just remember that a Project can be composed of several, not just one, audio files. So you create a Project (either explicitly or by simply starting the app) and then import audio files into it (again, either explicitly or by simply dragging one onto the app). When you are done with your edits, you then export the audio into a new file (or over the original).
So, after downloading and installing Audacity, start it.
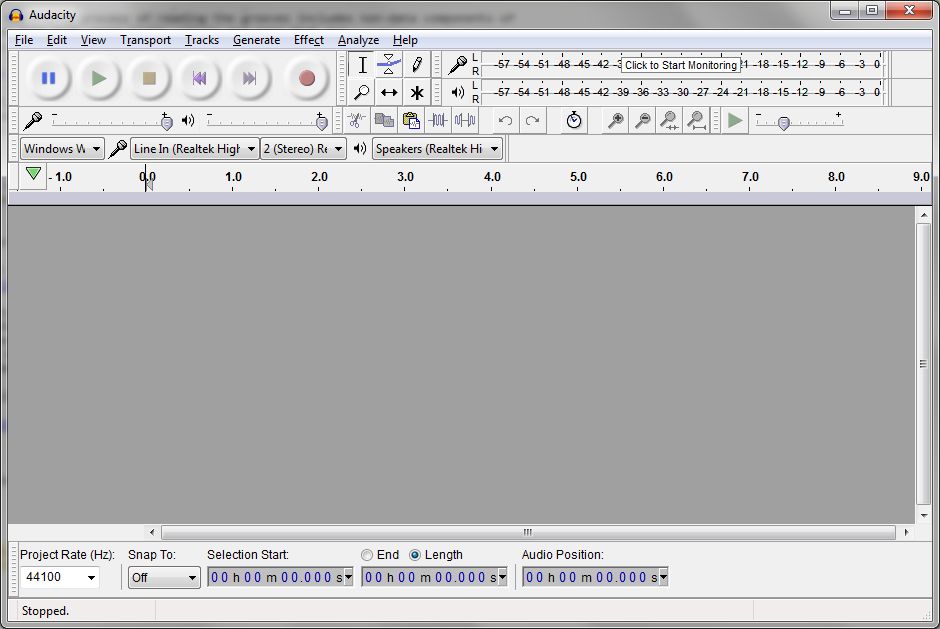
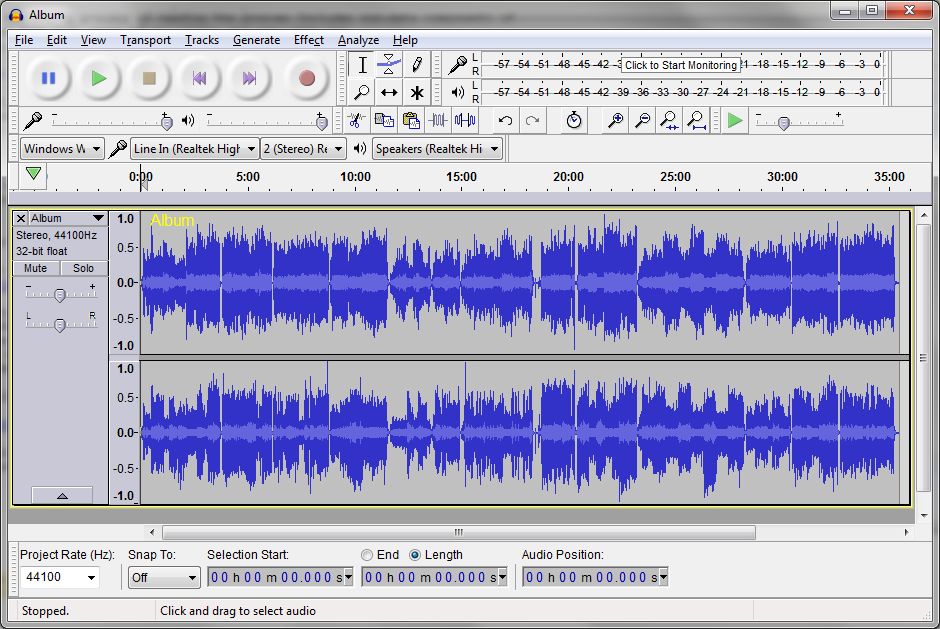
When Audacity starts, it automatically creates an empty project. So now all you have to do is simply drag the digital audio file you created in the previous step on top of Audacity to load it into the current project.
Remove Side-Changing Noise
Now, our very first step is to remove the noise from changing record sides (approximately in the middle of the album). The way to do this is to select, by dragging the mouse, the section you want to examine. (It's generally easy to find the changeover spot, because it literally looks different than the other inter-track spaces.)
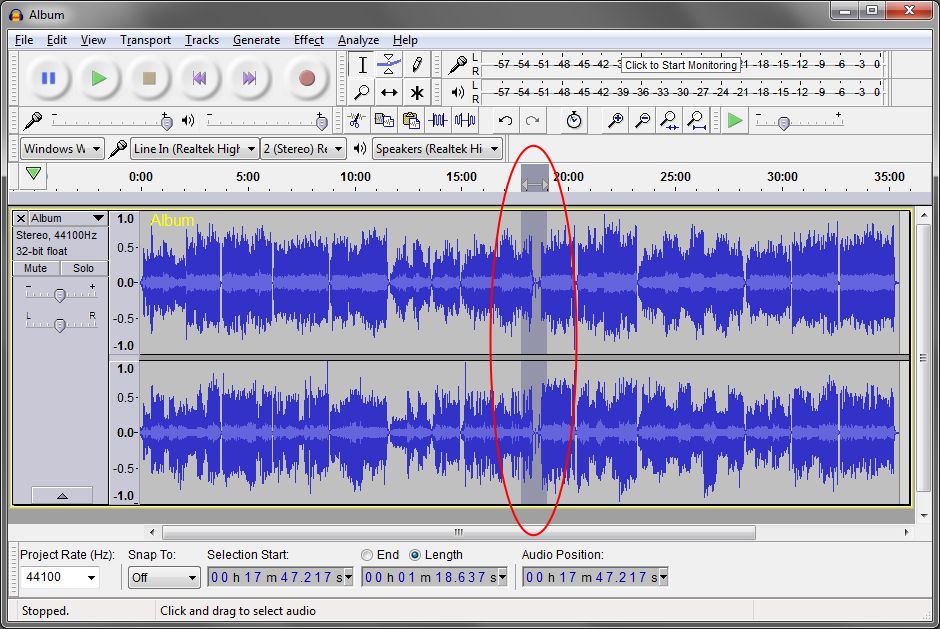
There are four icons on the toolbar that control zoom. They are, from left-to-right, Zoom In, Zoom Out, Zoom to Selection, Zoom to entire file.
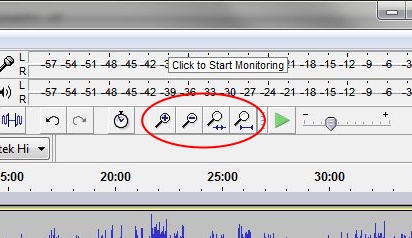
So clicking Zoom to Selection now will do just that.
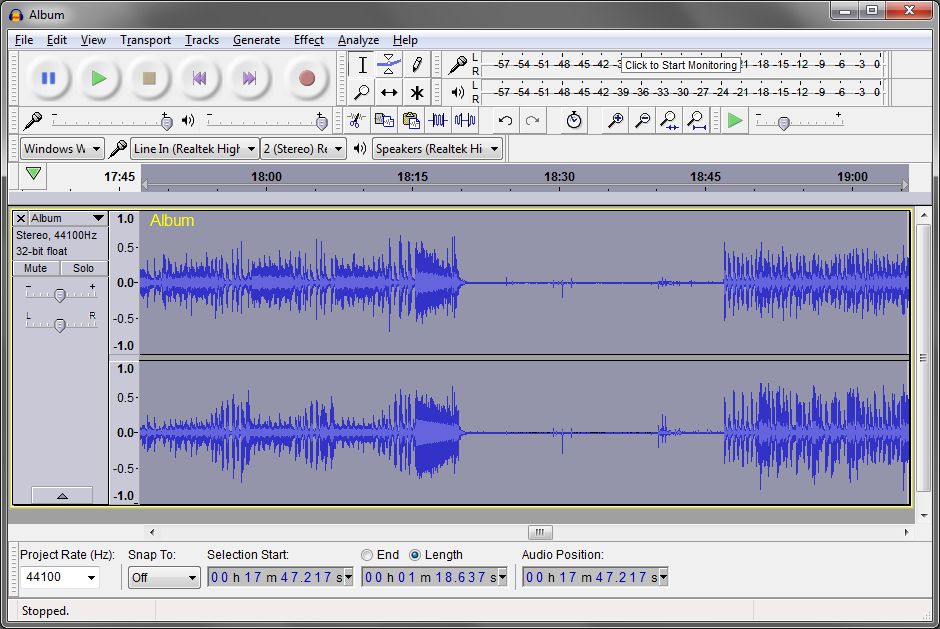
Now you'll want to select the section you want to remove, but be sure and leave at least a second of space between the two tracks.
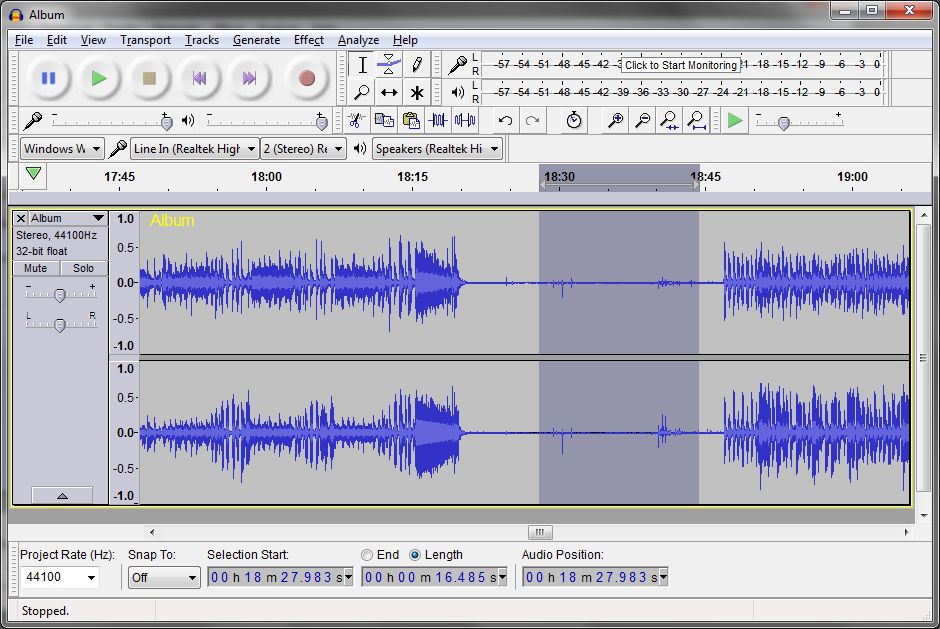
Then all you have to do is tap your computer's Delete key and the offending section will be removed.

Reduce General Surface Noise
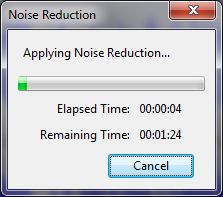
Surface noise from a vinyl record includes ticks and pops but a more insidious problem is rumble and possible hiss that continue through the entire disk. Fortunately, Audacity provides a simple and effective method of removing this constant noise without impacting the music. You'll find it on the Effects menu. But before you look at the menu, you will need to select a small portion of the file in between tracks, so the noise can be analyzed apart from the music. The best place to look, I have found, is between tracks in the middle of their side. After selecting and zooming in to the selection, tweak it so the sample does not include obvious pops. In this step we are just getting a noise sample.

Now, click Effect…Noise Reduction. That will bring up the Noise Reduction dialog. But we are not ready to apply noise reduction; instead we have to click the Get Noise Profile button.
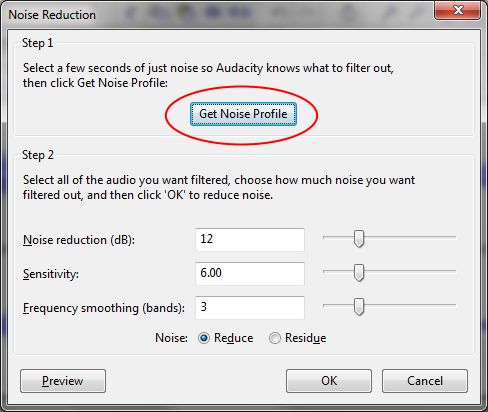
Now that Audacity knows what this file's noise "looks like", we must select the entire file and click Effects…Noise Reduction again. Now that we already have our noise profile, we'll click the OK button and allow it to do its thing.
Remove Ticks and Pops
With the entire file still selected, now click Effect…Click Removal.
You might need to adjust the parameters a touch—I had to reduce the Threshold from 200 to 100. Too low and most clicks will be missed; too high, and non-clicks might be altered (like the sudden blast of a trumpet).
Audacity has implemented Edit…Undo, so give your work a listen before going on to the next step.
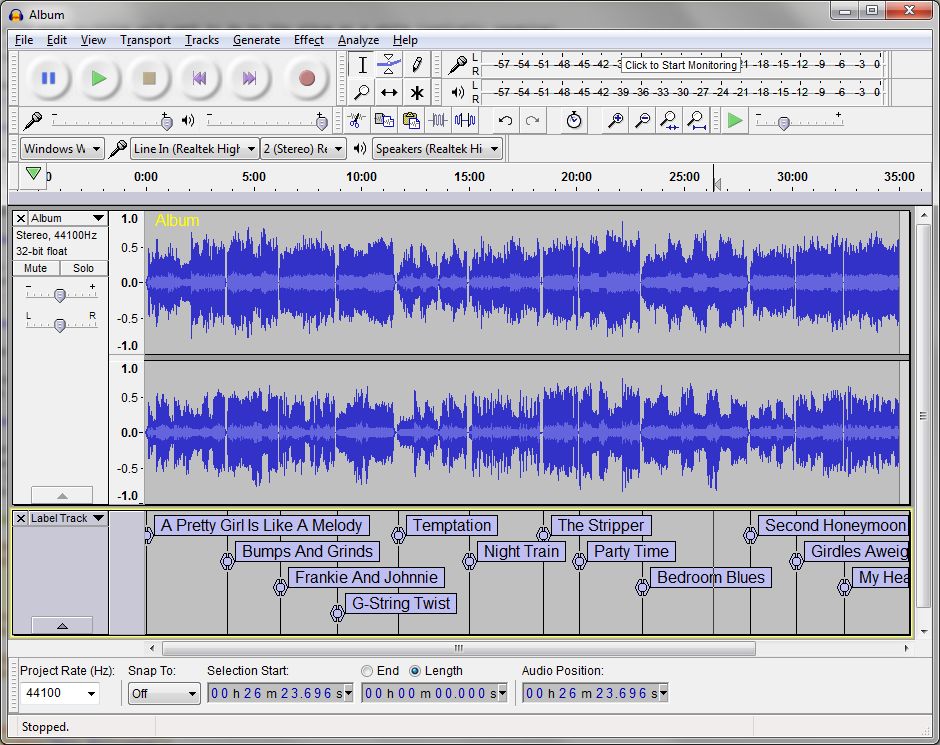
Splitting Tracks
Now that we've done anything we'd want to do to the album as a whole (sonically speaking), it's time to split it into individual tracks. This is done based on the silence that normally separates tracks, generally about two seconds of it.
To let Audacity split the tracks for you, choose Analyze…Silence Finder, which will bring up this dialog:
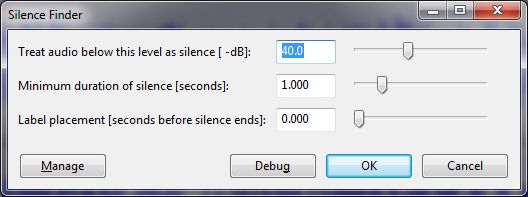
I have modified the default values a bit after some experimentation. Especially note the minimum delay at 1 second. On some albums, you might need to go even lower. But too low, and you risk false positives. That's okay, because the Silence Finder doesn't actually do anything to your audio; it simply adds labels to the end of each silence (by your definition on this dialog box) it finds. But obviously it will be less work for you if there aren't too many false labels to remove.
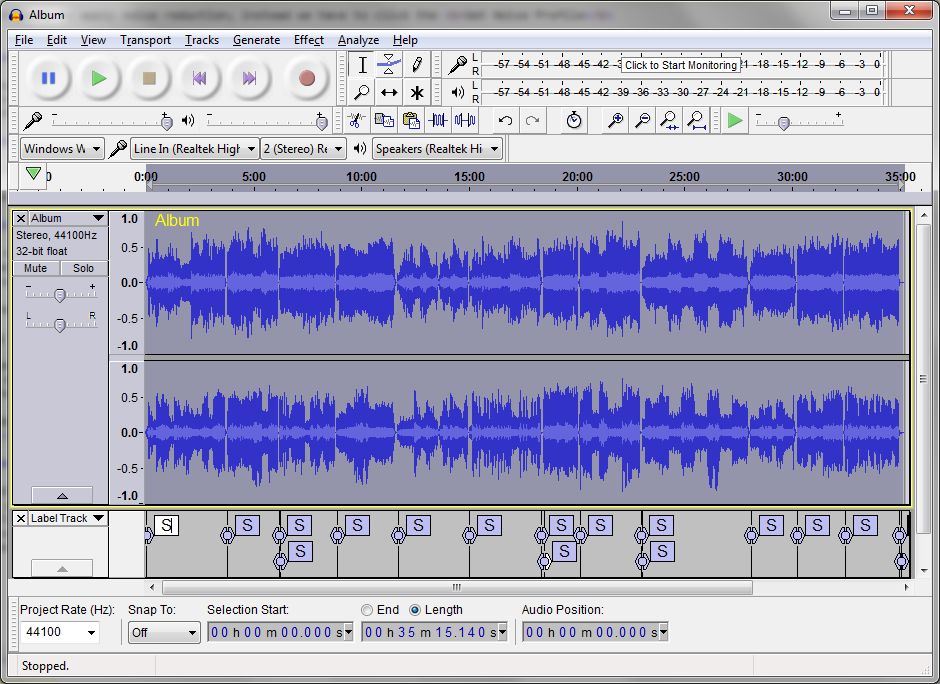
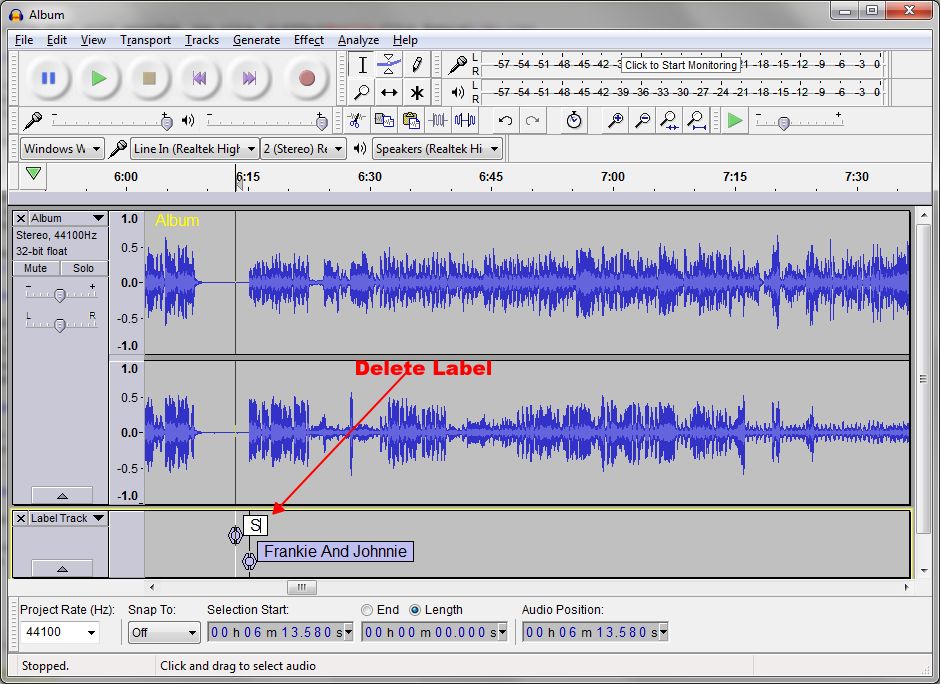
As you can see, you can even tell where there's an extra label. But what we're going to do, is zoom in closer so we can see which label is the "real" one, and to change the default label "S" to the actual title of that track.

All you have to do is click inside the label and type.
When you come to a spurious label, right-click in it and select Delete Label. Then name the good one.
There are, of course, a few albums (of live performances, for example) where there is no silence between tracks. In such cases, you'll have to mark the tracks manually, which you do by clicking where you want the break to occur, then using the Tracks…Add Label at Selection command will insert the label.
When you are done removing spurious labels and filling in the rest, zoom out. You should have one label for each track (count 'em).
Now we are ready to File…Export Multiple… to, at one time, create the separate tracks and convert them to the digital audio format of your choice.
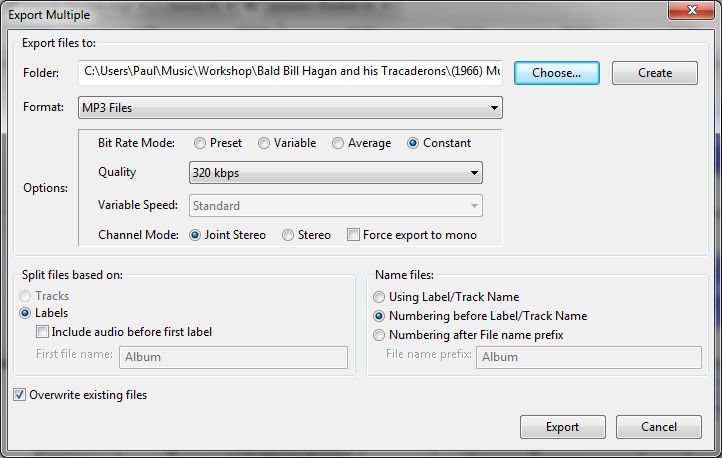
In this case, I have chosen to save these tracks as MP3s.
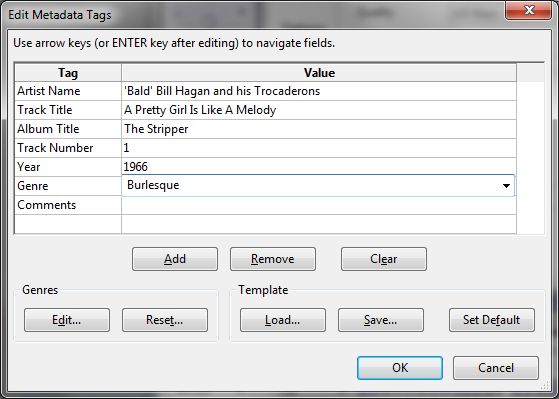
When you click Export, a dialog box will appear once for each track. The box will appear with the track number and track title already provided (from context, and from the label names). The box contains fields for the Album, Artist, and so on. You only need provide this additional information once, as it will be easy to repeat it with MP3tag. So, after the first appearance of the dialog, you may simply click OK until you've dismissed the last one.
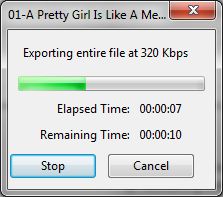
In a very few minutes, your tracks will have been saved.
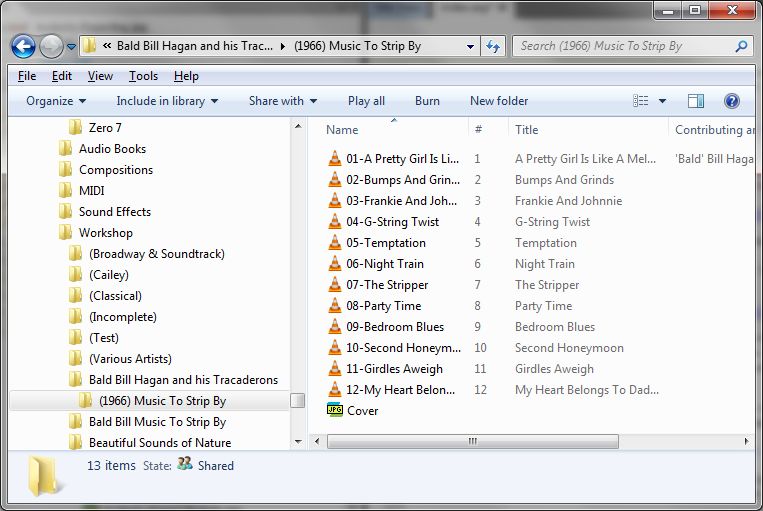
And you'll find them in the desired folder, ready for the Polishing steps (including populating all tracks with the Album and Artist from the first).