


| By: Paul S. Cilwa | Viewed: 4/18/2024 Posted: 9/2/2017 |
Page Views: 2911 | |
| Topics: #Music #Ripping | |||
| How to extract the audio data from a vinyl or shellac disk with a USB turntable. | |||
I happen to own an Ion PureLP USB turntable. So can you; Amazon sells them for under $95 (as of this posting). The Ion, despite its name, also plays 45s and 78s.
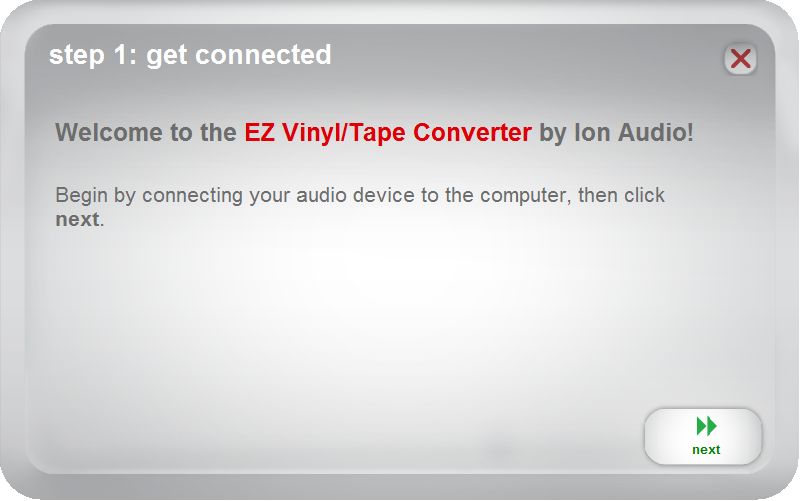
Mine came with bundled software, an app called EZ Vinyl/Tape Converter. However, for this post, I went to Ion's web site and downloaded and installed the latest version.
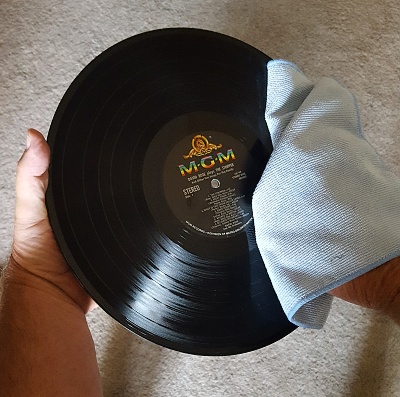
Now, before actually playing the record, it's a good idea to remove as much dust and dirt from the vinyl (or shellac) as possible. I find the new microfibre dust cloths work well.
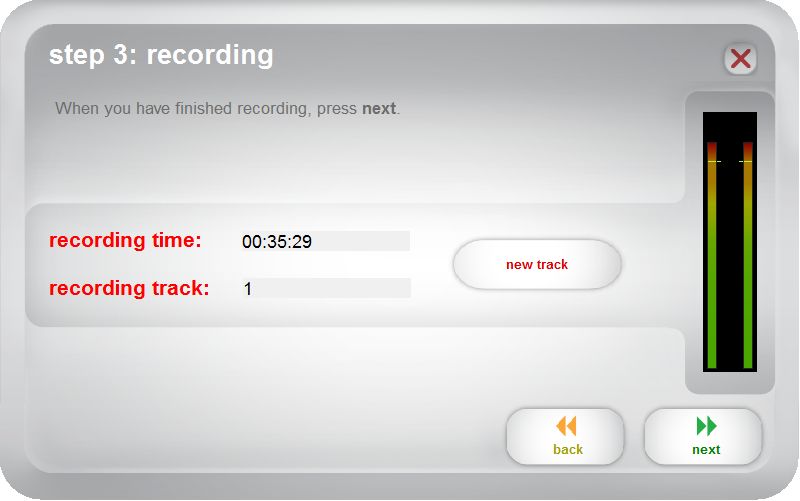
Turn on the turntable and plug it into your computer, then click Next on the EZ Vinyl/Tape Converter.
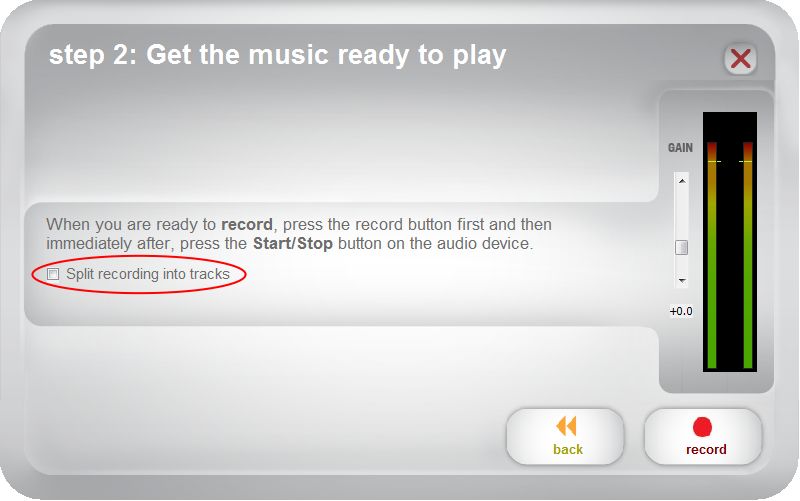
The applet will automatically split the digital recording into discrete tracks. However, it does such a bad job of tagging the results, (and even naming the files) that I find it simpler to just record the entire disk—generally both sides—into one long track.
(I would not do both sides, if they did not appear and sound to have about the same degree of wear. That's because the Noise Removal step that comes later, needs a baseline and if it's different for each side, the sides need to be fixed separately.)
So, you'll want to make sure Split recording into tracks is unchecked.
Place the disk upon the turntable platter in the usual way; press Record and place the stylus on the outer rim of the disk. Let it play. You should be able to hear the record playing through your computer speakers.
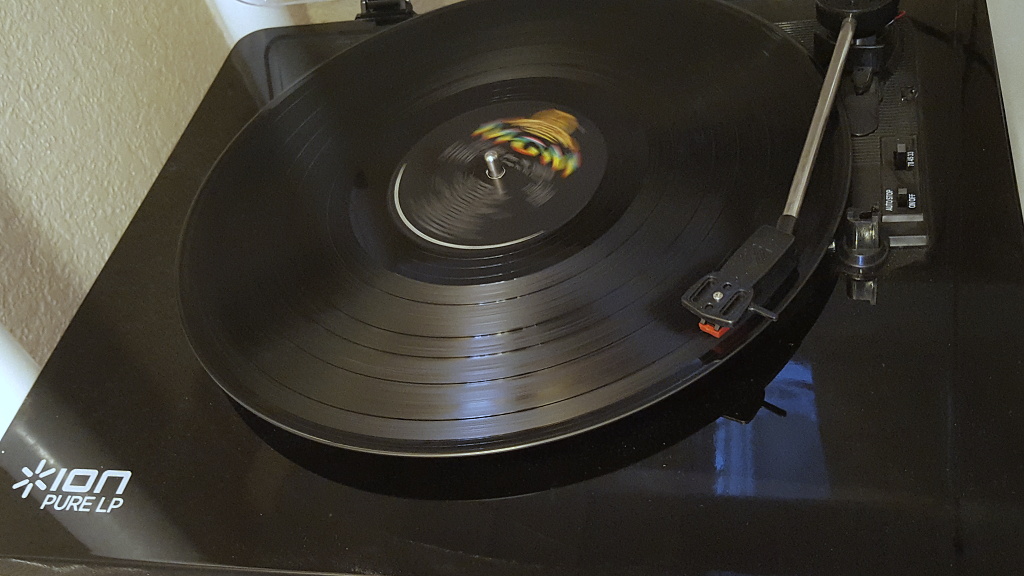
At this point, the digitizing will proceed automatically to the end of the record side. If you intend to record both sides together, leave the app alone and flip the disk. (We'll get rid of the noise of lifting and replacing the stylus between sides, later.)
When you have advised the applet that recording has completed by clicking Next, the final step appears, an opportunity to provide an artist, album and title, except it does not use this info to tag the output file. Instead, it uses the artist and album to create a folder, and the album will be placed in that folder. The applet does not allow us to customize any of that and the naming convention it uses not only doesn't match ours, it's awful! But we can change that once the file has been saved.
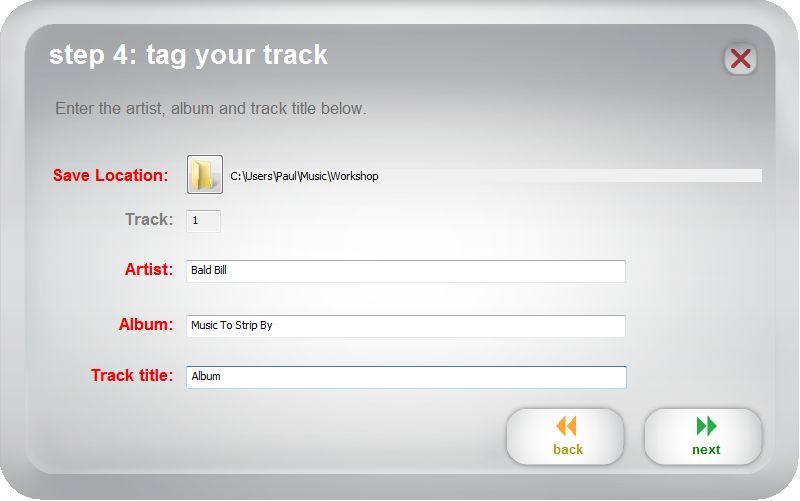
Please note that none of these tags is actaually made part of the file. EZ Vinyl/Tape Converter only stores WAV files, and, while the WAV format does support embedded tags, EZ Vinyl/Tape Converter doesn't store them. Instead, the Artist and Album together form a folder; and the tracks are saved as files with the name you provide…more or less. When you click Next the tracks will be saved.
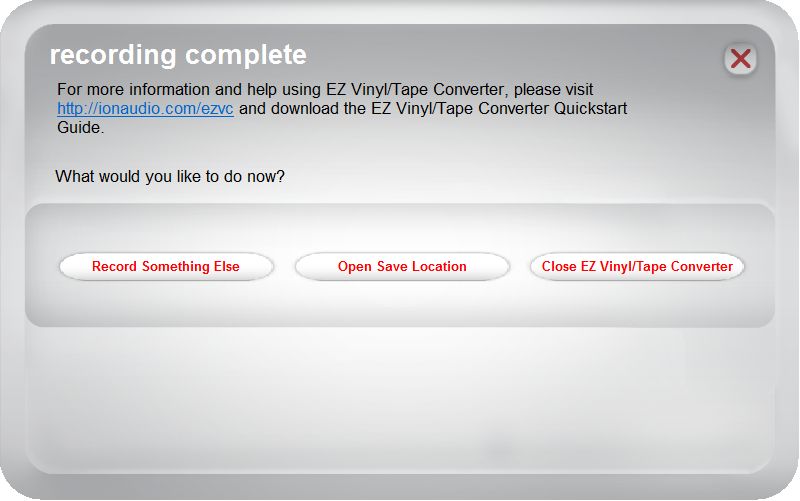
Clicking Open Save Location is a quick way to find the resulting folder and file. Notice in the screen grab below, in the folder list at the left, I have already created a proper folder for the artist ("Bald" Bill Hagan and his Trcaderons). That's where I'm going to put the finished tracks when I've cleaned and split them apart. A quick check at Discogs.com finds the album so I can learn the release date, 1966 (which wasn't actually printed on albums in the sixties), and get the cover art.
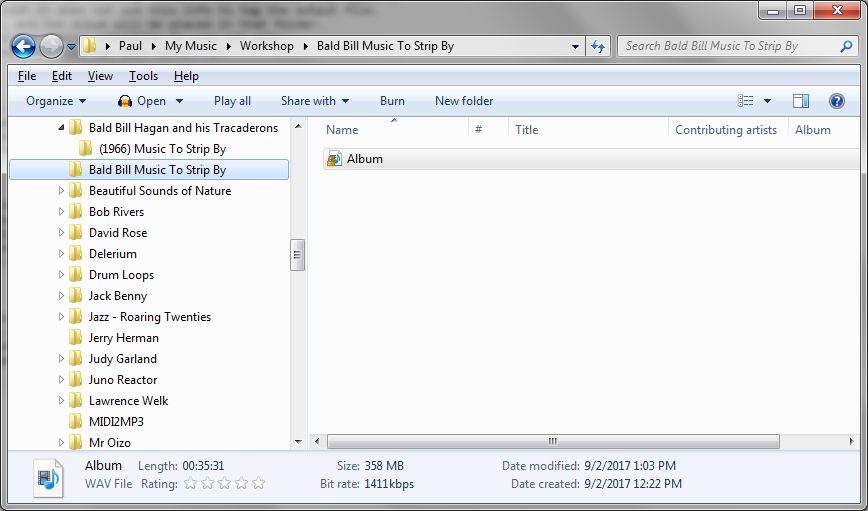
So, to recap, what do we have? Digital audio files, in the lossless WAV format, containing all the audio from your record (including surface noise) but no internal tags. This is not a finished product, but it is a solid start. The next post in this series will describe how to remove the surface noise and convert the files to a more useful digital audio format.